Learn to create the perfect commit in just two steps
In this blog, I'll guide you through the process of creating a perfect pull request in just two easy steps through practical code examples.


As a developer, proficiency in version control systems like Git is no longer just a desirable trait, it's a necessity. Although, there's nothing much to creating a perfect commit, many developers still struggle in this area, as I did when I was new to it. A well-crafted commit not only improves the readability and maintainability of one's codebase but also facilitates smoother collaboration within one's team.
There are only two parts to creating a perfect pull request:
Choose and add the right changes, i.e., make it modular.
Write a good and descriptive commit message.
Let's focus on the first step. As I have said already, our goal should be to craft the commit in a modular fashion. One commit should only include changes related to a single topic only.
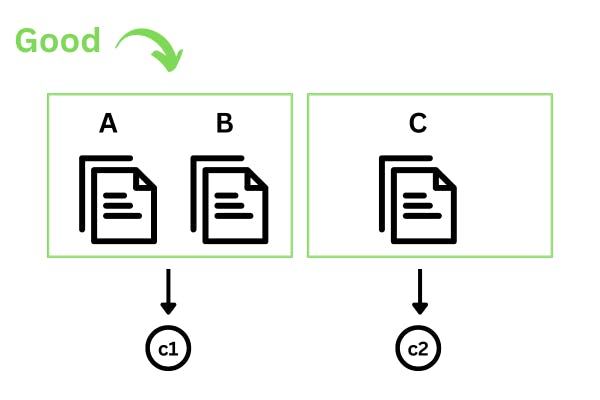
It's not a good practice to cram all the changes into one commit, irrespective of the topics that they are related to.
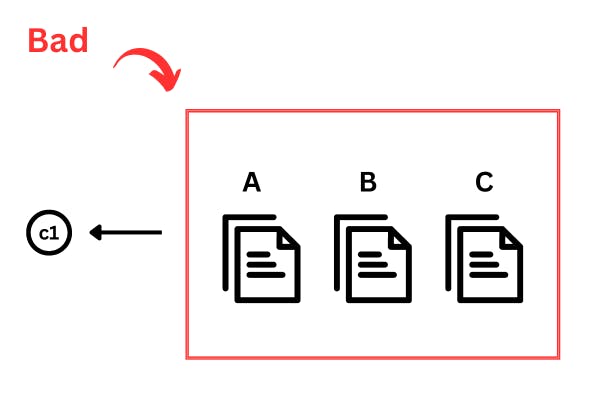
A commit should be easy to understand for oneself as well as one's colleagues, hence, it is recommended to be mindful of the changes added to one commit as to not increase its complexity too much.
It's possible for us to select only specific files or even specific portions of a file to be added to a commit.
Let's look at an example. I had a directory with the following files initially:
- index.html
- styles.css
- img1.png
- img2.png
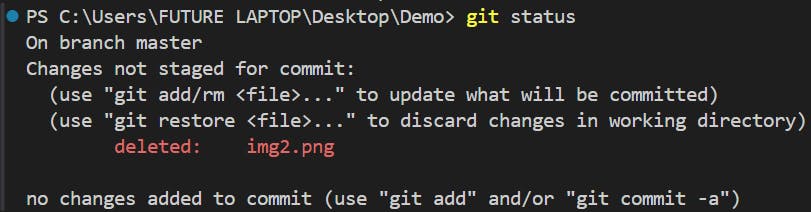
After making some changes, this is how my working tree looked:
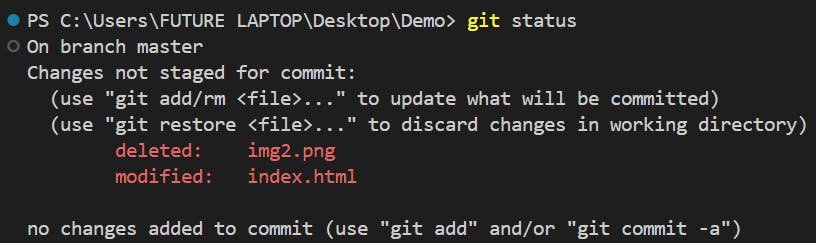
Changes made in the working tree are not automatically recorded by Git. Instead, we need to explicitly stage these changes using the git add command and then commit them to the repository using git commit. This separation allows us to work on changes incrementally and selectively include them in our commits.
Let's suppose that I only want to add the changes made to the index.html file. I can do so by the command:
git add index.html
This command stages only the index.html file for the next commit, which we can make as such:

If we check the status of the working tree again, we'll see that the change of img2.png being deleted is still not staged.
Similarly, we can also stage specific changes within a file and leave out the rest.
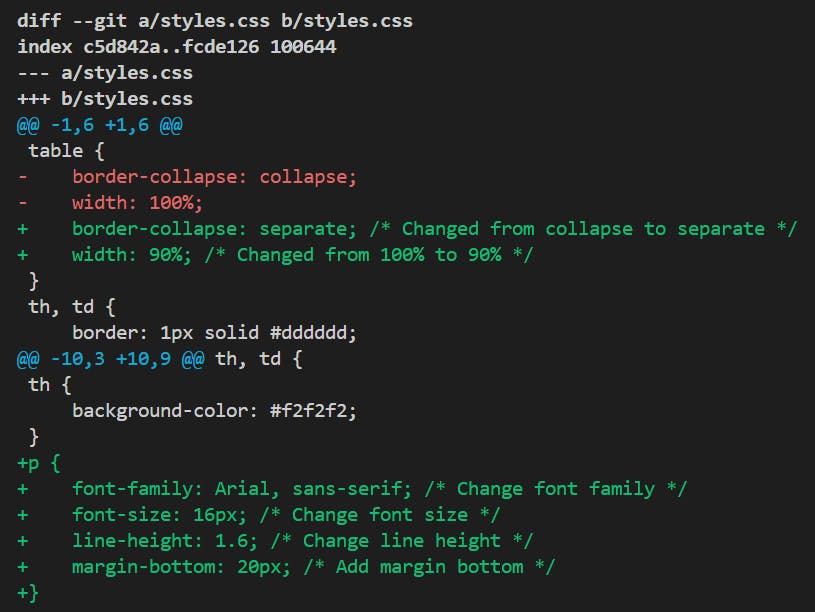
I made two changes in the styles.css file. By the way, we can see the changes made in a file in a detailed way using the git diff styles.css command.
Suppose, we only want to add the changes in the style of the table. We can do this using the following command:
git add -p styles.css
The git add -p command, also known as “git add --patch,” is a powerful tool in Git that allows us to selectively stage changes within a file, or even specific parts of a file, for committing. When we use git add -p, Git will interactively prompt you with each change detected in the specified file (in this case, “styles.css”).
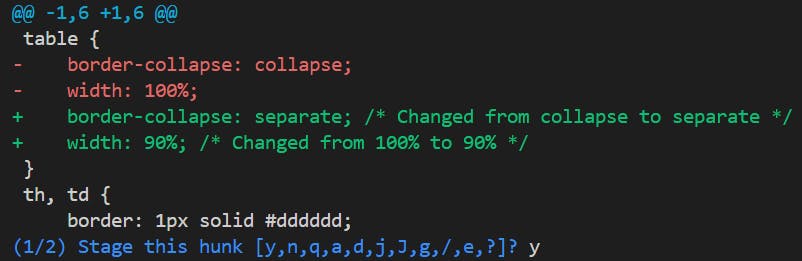
Now, when we make the next commit, only the changes made in the style of the table will be added, and not the paragraph style, because that's how we staged the changes.
Now, as of the second part, related to writing a good commit message. Here are some brief guidelines:
Summary:
Keep it concise (around 50 characters).
Clearly state the purpose of the commit.
Use the imperative mood (e.g., “Fix”, “Add”, “Update”).
Description:
Provide additional context if needed.
Explain why the change is necessary.
Describe any side effects or potential impacts.
Formatting:
Separate summary from description with a blank line.
Limit each line to 72 characters.
Use bullet points or paragraphs for readability.
And this is all you need to know to create your next perfect commit. Let me know in the comments below if you found this blog helpful! Plus, I recommend that you follow this very helpful tutorial for learning about more Git concepts and best practices.
Thanks for reading!