
Safely use 'dangerouslySetInnerHTML' in your React applications
A detailed probing into the common use cases, associated risks, mitigation and best practices, and a mini tutorial of React's dangerouslySetInnerHTML


Introduction:
As many of you already know, React implements its own Virtual DOM for the rendering of UI components, which is an abstraction or lightweight copy of the real browser DOM. Keeping that in mind, React does some things differently.
dangerouslySetInnerHTMLis React’s replacement for usinginnerHTMLin the browser DOM.
We might encounter some scenarios in which we have to inject HTML content directly into our components, and React provides us with a way to do that using dangerouslySetInnerHTML.
When to use it?
As the name of the prop might suggest, it can be risky to use it, so it shouldn't be our first option usually. However, there might be some instances in which it will be the only viable option, such as:
Rendering User Generated Content: For the rendering of the content if any that your application allows to be created or edited by the users, which contains HTML markup.
Integrating Third-Party Widgets: In this case, some third-party libraries or widgets might require you to embed your HTML directly into your components.
Rendering Pre-Existing HTML: You may have to render some legacy code or HTML in the form of strings.
However, as I've already mentioned, using dangerouslySetInnerHTML should be your last resort. Whenever possible, try to use React's standard data binding mechanisms (props and state) to ensure predictable and safe web applications.
How to use it safely?
Now that we've identified some scenarios in which we might use dangerouslySetInnerHTML, let's explore some ways of doing it safely.
Sanitize and Validate HTML:
Before using this prop, it's crucial to sanitize and validate the HTML that is to be injected to prevent potential security vulnerabilities like cross-browser scripting (XSS) attacks.
You can use third-party libraries like
DOMpurify,js-xss, andsanitize-htmlto do so.Here's a code snippet for how you can use
DOMpurify:import DOMPurify from 'dompurify'; function RenderHTML({ htmlContent }) { const sanitizedHTML = DOMPurify.sanitize(htmlContent); return <div dangerouslySetInnerHTML={{ __html: sanitizedHTML }} />; }We'll look more into the syntax for dangerouslySetInnerHTML later on.
Only Inject Content From Trusted Sources:
It's important to know the HTML markup that's going to be injected beforehand. Avoid using content fetched from remote APIs or that originated from users without putting in necessary checks and conditions to ensure its health.
Isolate The Usage:
It's wise to put the content rendered using dangerouslySetInnerHTML isolated, i.e., in a different component or by using conditional rendering to avoid any unnecessary mixing.
Document:
Whenever you use dangerouslySetInnerHTML in your codebase, try to document its usage. Explain sufficiently why you're using it and the precautions that you've taken to ensure a safe operation.
How to use it?
Let's use dangerouslySetInnerHTML to render the blogs for a blogging site named Tech Bites.
Create your React project:
npx create-react-app directoryname
Once your project is created, open the directory in VS Code. Then open the integrated terminal. Install the dependencies. I want to install JSON server and React Router DOM.
npm install -g json-server
npm i react-router-dom@6
I'm going to use Tailwind CSS to add some minimal styling to the application, however, you can choose custom CSS if you would like. You can install Tailwind CSS and do the necessary configurations by going to this link.
To not lose focus and to keep this blog from straying too much from the topic, I'm not going to explain, in depth, the project structure and all the components inside it. However, the code for the entire project will be available here. You can simply clone the GitHub repository, run npm install to install the necessary dependencies and practice from there.
The data/db.json file in our directory will look something like this:
{
    "blogs": [
        {   "id": "1",
            "title": "Learn JavaScript Basics",
            "content": "Learning JavaScript: A Journey of Discovery JavaScript is a versatile and powerful programming language that has become an essential tool for web development. Whether you're a beginner or an experienced developer looking to expand your skill set, learning JavaScript can open up a world of possibilities. In this blog post, we'll explore the journey of learning JavaScript without diving into specific code or headings. Why Learn JavaScript? Before we embark on our journey, let's briefly discuss why learning JavaScript is worthwhile. JavaScript is the language of the web, enabling you to create dynamic and interactive web applications. It's used on both the client-side and server-side, making it an essential skill for full-stack developers. JavaScript also has a vast and active community, which means there are abundant resources and support available for learners. Getting Started To start learning JavaScript, you'll need a few basic tools. Most importantly, a web browser is all you need to begin experimenting with JavaScript. Modern web browsers like Google Chrome, Mozilla Firefox, and Microsoft Edge come equipped with built-in developer tools that allow you to write and run JavaScript code in real-time. Additionally, you might want to have a simple text editor or Integrated Development Environment (IDE) handy for writing and organizing your JavaScript code. Popular choices include Visual Studio Code, Sublime Text, or even a plain text editor like Notepad. Understanding the Basics JavaScript is known for its flexibility, but like any programming language, it has its fundamental building blocks. As you embark on your journey, you'll want to explore the following concepts: Variables: Variables are used to store and manage data. You'll learn how to declare variables using keywords like var, let, and const. Data Types: JavaScript supports various data types, including numbers, strings, booleans, objects, arrays, and more. Understanding these data types is essential. Operators: Learn how to perform operations like addition, subtraction, comparison, and logical operations using JavaScript's operators. Control Flow: Master control structures like conditionals (if statements, switch statements) and loops (for loops, while loops) to control the flow of your code. Functions: Functions are reusable blocks of code that perform specific tasks. Understanding how to create and use functions is crucial for JavaScript development. Objects and Classes: JavaScript is an object-oriented language, so you'll delve into creating objects and classes to organize and manipulate data. Events and DOM Manipulation: For web development, you'll explore how to respond to user interactions by handling events and manipulating the Document Object Model (DOM). Practice and Projects Learning JavaScript is not just about understanding concepts; it's about applying them. As you progress, consider working on small projects to solidify your knowledge. Projects could range from simple web page enhancements to interactive web applications. The more you practice, the more confident you'll become in your JavaScript skills. Resources for Learning The internet is brimming with resources to help you learn JavaScript: Online Courses: Platforms like Coursera, Udemy, and edX offer comprehensive JavaScript courses for learners of all levels. Documentation: The official Mozilla Developer Network (MDN) JavaScript documentation is an invaluable resource for in-depth explanations and examples. Books: Numerous books, both in print and digital formats, cover JavaScript comprehensively. Community: Join online forums and communities like Stack Overflow and GitHub to seek help, share your knowledge, and collaborate with other developers. Tutorials and Blogs: Many websites and blogs provide step-by-step tutorials and articles on JavaScript topics. Never Stop Learning JavaScript is a dynamic language, and the web development landscape is constantly evolving. As you continue your journey, stay curious and open to new techniques, libraries, and frameworks. Learning JavaScript is not a destination but a continuous journey of growth and discovery. In conclusion, learning JavaScript can be an incredibly rewarding experience. It empowers you to build interactive and dynamic web applications, and it's a valuable skill in today's technology-driven world. So, grab your text editor, fire up your web browser, and start your journey into the world of JavaScript. Remember, the key to mastering JavaScript is consistent practice and a passion for learning."
        },
        {
            "id": "2",
            "title": "Learn React Basics",
            "content": "Exploring React A Foundation for Building Dynamic User Interfaces React is a popular JavaScript library for building user interfaces, and it has gained widespread adoption in the web development community. Whether you're a beginner taking your first steps in web development or an experienced developer looking to dive into React, this blog post will guide you through the basics without diving into specific code or headings. Why Learn React? Before we begin our journey, let's briefly discuss why learning React is valuable. React simplifies the process of building dynamic and interactive user interfaces for web applications. It's known for its component-based architecture, which promotes reusability and maintainability of code. React also has a large and active community, ensuring you have access to a wealth of resources and support as you learn. Getting Started To start learning React, you'll need some foundational tools and knowledge: JavaScript Proficiency: While not mandatory, having a good grasp of JavaScript fundamentals will significantly aid your understanding of React. Text Editor or IDE: You'll need a code editor like Visual Studio Code, Sublime Text, or another of your choice for writing React code. Node.js and npm (Node Package Manager): React applications are typically created and managed using Node.js and npm. Install Node.js to get started. Basic Understanding of HTML and CSS: React involves creating user interfaces, so a familiarity with HTML for structure and CSS for styling is beneficial. React Fundamentals Before diving into React, let's explore some fundamental concepts: Components: React applications are built using components, which are reusable, self-contained units of code responsible for rendering a part of the user interface. Components can be simple (like a button) or complex (like an entire form). Props: Props (short for 'properties') are a way to pass data from a parent component to a child component. They are read-only and help customize and configure components. State: State allows a component to manage and react to changes in data over time. Components can have internal state, and when state changes, React re-renders the component. Lifecycle Methods: React components have a lifecycle, from creation to destruction. You can tap into these lifecycle methods to perform actions at specific points during a component's life. Virtual DOM: React uses a virtual DOM to efficiently update the actual DOM. Instead of directly manipulating the DOM, React calculates the minimal number of changes required to update the UI. React Router: For building single-page applications, you'll likely need to use React Router, a library for adding routing functionality to your React apps. Practice and Projects Learning React is most effective when you practice by building real-world projects. Start with simple projects like creating a to-do list or a simple calculator, and gradually move on to more complex applications. Building projects not only reinforces your knowledge but also showcases your skills to potential employers or clients. Learning Resources Numerous resources are available to help you learn React: Official React Documentation: The official React documentation is a comprehensive resource that covers everything you need to know about React. Online Courses: Platforms like Udemy, Coursera, and Pluralsight offer React courses for all skill levels. Books: Many books, both in print and digital formats, provide in-depth guidance on React. Community: Joining the React community on platforms like Stack Overflow, Reddit, and GitHub can be immensely helpful for seeking assistance and learning from others. Tutorials and Blogs: Many websites and blogs offer step-by-step tutorials and articles on React topics. Never Stop Learning As you dive into React, remember that it's a dynamic library, and the ecosystem is continuously evolving. New features, best practices, and tools emerge regularly. Staying up-to-date with the latest developments is crucial to becoming a proficient React developer. In conclusion, learning React is a valuable investment in your web development journey. Its component-based architecture, coupled with its robust community support, makes it an excellent choice for building modern web applications. So, grab your code editor, install Node.js, and embark on your journey to mastering React. The more you practice and explore, the more confident and skilled you will become in creating dynamic user interfaces. Happy coding!"
        }
    ]
}
We'll fetch our blogs' data from here using a JSON server.
After, doing the bare minimum, the home page of our project will look something like this:

Opening any of these blogs will look something like this without dangerouslySetInnerHTML:
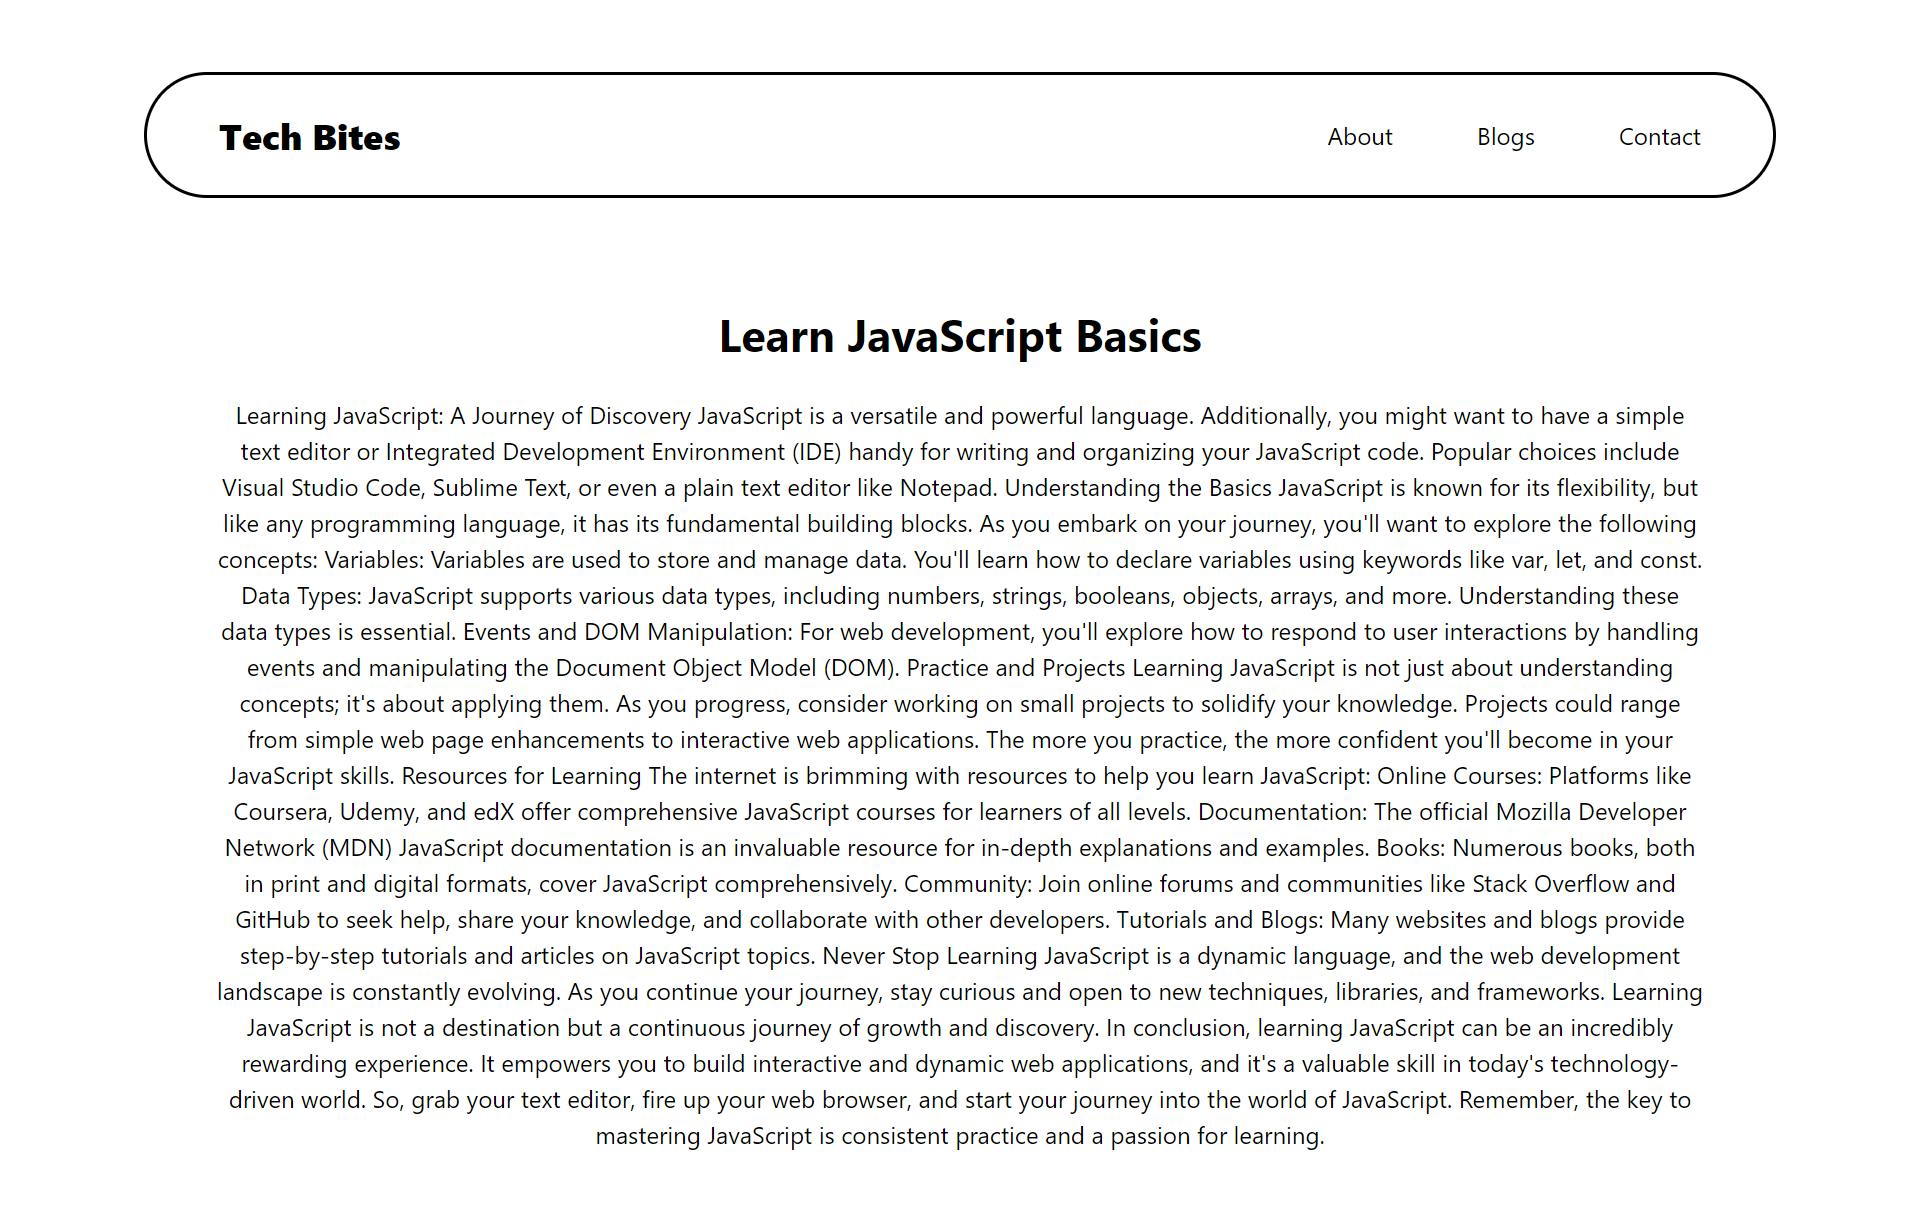
That doesn't look so great now, does it?
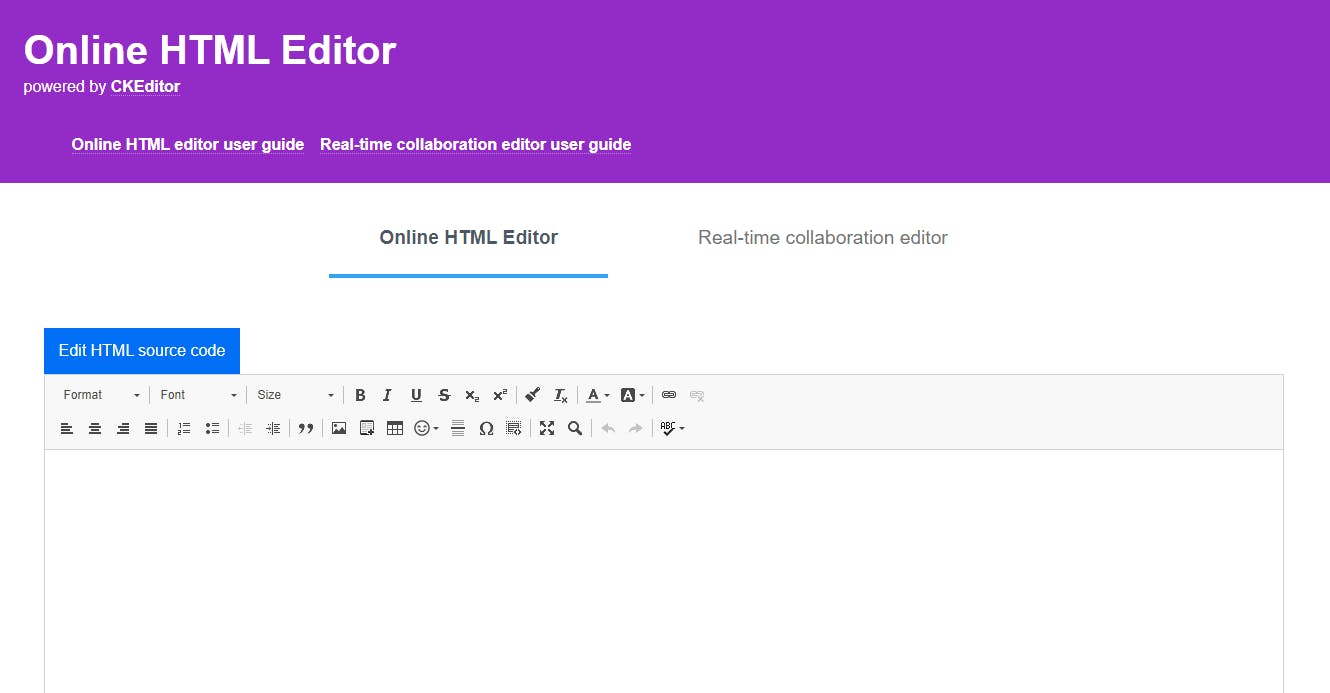
Let's create some HTML markup for our blog data.
You can use an online HTML editor to do so but make sure to format the resulting HTML string if you're going to put it into a JSON file through a JSON formatter and validator, else you'll get a ton load of errors.
I used the below editor to generate the HTML markup for my blog which I then converted into a string and formatted to make it JSON compatible.
Look at how I've used it in the component below:
export const Blog = () => {
    /*
          Logic to fetch the blog data from the JSON server.
    */
    const markup = { __html: blog.content }; // This syntax is necessary.

  return (
    <div className='flex flex-col px-12 my-12 mx-24'>
        <h1 className='text-center font-bold text-3xl my-6'>{blog && blog.title}</h1>
        <!-- This is the way to insert the markup within an element -->
        <p className='' dangerouslySetInnerHTML={markup}></p>
    </div>
  )
}
The result:

That's so much better! What we did was inject a raw HTML string as the content for the blog rather than just plain text using dangerouslySetInnerHTML. And this was only one use case, you can do much more with it.
Conclusion:
dangerouslySetInnerHTML() is a powerful feature in React that should be used sparingly and with great care. While it allows you to inject HTML content into your components, it can introduce security risks if not used correctly. By following the best practices outlined in this blog post, you can safely incorporate it into your React applications when it's necessary, ensuring both the functionality and security of your codebase. Always prioritize security and user safety when working with potentially untrusted HTML content.
Read more about it here.
Thanks for reading!