
Secure your web apps with Firebase Authentication
Easily implement authentication solutions using Firebase Authentication


Introduction:
Firebase offers a robust and user-friendly authentication service, which enables developers to quickly integrate authentication solutions in their web and mobile apps. Without having to start from scratch, Firebase Authentication makes it simple to add secure user sign-up, sign-in, and identity management to your projects. In this article, we'll look at Firebase Authentication's fundamentals, as well as how to use it effectively in your projects.
Prerequisites:
Before you get started with Firebase Authentication, you should have the following prerequisites in place:
Firebase Project: You'll need a Firebase project. You can create one by visiting the Firebase Console (console.firebase.google.com) and following the setup instructions.
Development Environment: Ensure you have a development environment set up for your chosen platform (web or mobile).
Firebase SDK: Depending on your platform, you'll need to install the Firebase SDK. For web development, you can include Firebase using a script tag. For mobile development, you can add Firebase to your project using package managers like npm or CocoaPods.
Firebase Authentication – Setup and Usage:
For the sake of this tutorial, we're going to use Firebase Authentication along with React JS.
Create a React project:
To get started, create a new React project by running the following command in the terminal of your choice:
npx create-react-app my-app
We are going to create a note-sharing web app, where users will be able to sign in, create a note and post it, as well as view notes from all the other users. We'll use Firebase to handle the user authentication and to control and limit access to certain functionality accordingly, i.e., only the logged-in users will be able to create a note and so on.
To prevent this blog from getting too long and to not lose focus, I'm not going to explain, in depth, the project structure and all the components inside it. However, the code for the entire project will be available here. Feel free to clone the GitHub repository and work through it on your own.
Set up Firebase SDK:
Open your newly created project in VS Code. Open the integrated terminal. Run either of the following commands:
npm install firebase
# or
yarn add firebase
This will install Firebase in your project directory.
Create a Firebase project:
Sign in to your Firebase account, go to the Firebase console, and click on Create a new project.
Once, you've created a new project on Firebase, navigate to the project's overview, and create a new web app. You'll be provided with the app's SDK setup and configuration. It'll look something like this:
// Import the functions you need from the SDKs you need
import { initializeApp } from "firebase/app";
// TODO: Add SDKs for Firebase products that you want to use
// https://firebase.google.com/docs/web/setup#available-libraries

// Your web app's Firebase configuration
const firebaseConfig = {
  apiKey: "your-api-key",
  authDomain: "your-auth-domain",
  projectId: "your-project-id",
  storageBucket: "your-storage-bucket",
  messagingSenderId: "your-messaging-sender-id",
  appId: "your-app-id"
};

// Initialize Firebase
const app = initializeApp(firebaseConfig);
Configure Firebase in your project:
Open your React project in VS Code or any other IDE of your choice. Inside the root directory of your project, create a .env file. Open that file and paste the following into it:
REACT_APP_API_KEY=your-api-key
REACT_APP_AUTH_DOMAIN=your-auth-domain
REACT_APP_PROJECT_ID=your-project-id
REACT_APP_STORAGE_BUCKET=your-storage-bucket
REACT_APP_MESSAGING_SENDER_ID=your-messaging-sender-id
REACT_APP_APP_ID=your-app-id
Replace the values with the correct values of your Firebase project's SDK setup and configuration.
Next, inside the same root directory of your React project, create a new directory by the name of firebase, inside that directory create a firebaseConfig.js file. Open that file and paste the following code into it:
import { initializeApp } from "firebase/app";

const firebaseConfig = {
  apiKey: `${process.env.REACT_APP_API_KEY}`,
  authDomain: `${process.env.REACT_APP_API_KEY}`,
  projectId: `${process.env.REACT_APP_API_KEY}`,
  storageBucket: `${process.env.REACT_APP_API_KEY}`,
  messagingSenderId: `${process.env.REACT_APP_MESSAGING_SENDER_ID}`,
  appId: `${process.env.REACT_APP_APP_ID}`
};

const app = initializeApp(firebaseConfig);
You've initialized a Firebase web app in your React project.
Set up Firebase Authentication:
Firebase provides you with multiple options for authentication.
Go to your Firebase project's overview, click on Authentication, and you'll see these Sign-in providers to choose from:
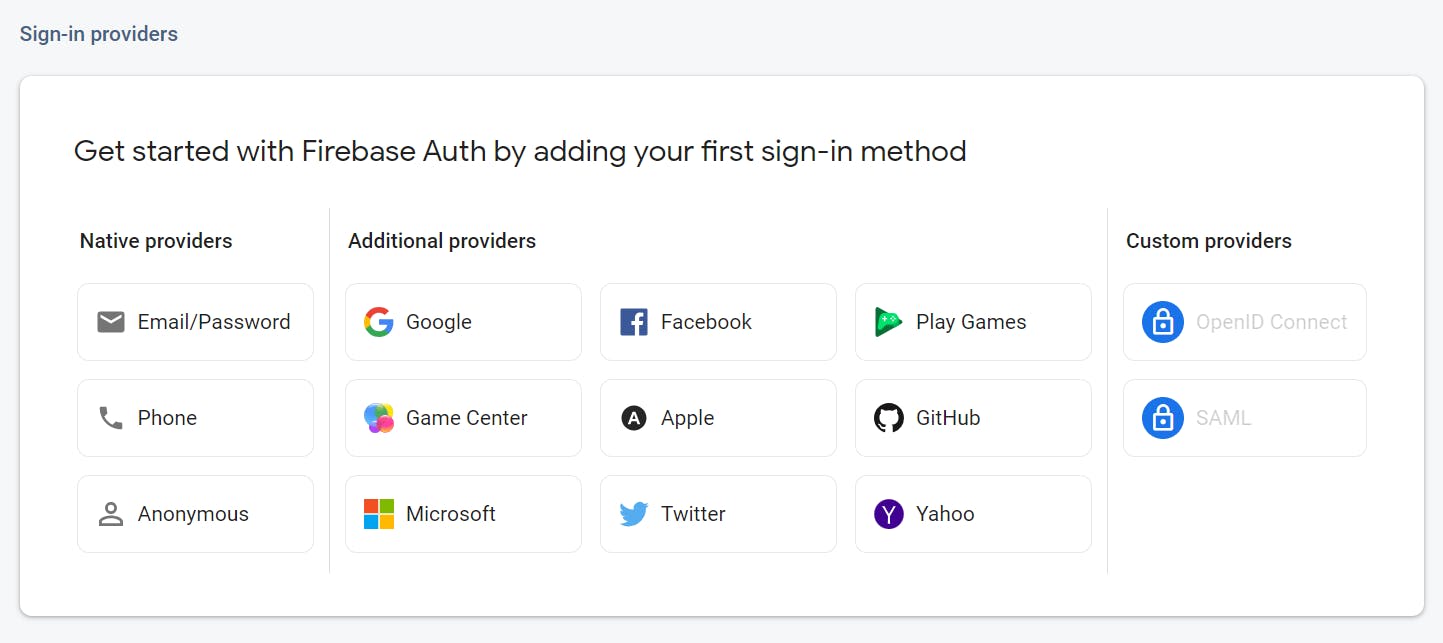
You can choose one or more of these, depending on your personal preference.
For our project, we're going to use Google as our authentication provider. Simply click on it and enable it.
If you enabled it correctly, you'll see it under Sign-in Providers in the Authentication/Sign-in method section:

Now, go back to your React project, and in the same firebaseConfig file, import the following from Firebase:
import { getAuth, GoogleAuthProvider } from "firebase/auth";
And then add the following code in the same file:
export const auth = getAuth(app);
export const provider = new GoogleAuthProvider();
You've initialized a new auth and provider object which you can export anywhere in your React project now for implementing authentication.
Let's see how you can do that.
Implement the Authentication Logic:
Below is a simplified version of a React component which displays login or logout options to the user depending on the state of the isLoggedIn variable.
import { useState } from 'react';
import { Link } from 'react-router-dom';

export const Header = () => {
  const [isLoggedIn, setLoggedIn] = useState(false)
  return (
    <div>
      {isLoggedIn ? (
          <Link to="/">
                  Logout
          </Link>
      ) : (
          <Link to="/">
                  Login
          </Link>
      )}
    </div>
  )
}
Let's import the auth and provider that we had initialized earlier:
import { auth, provider } from "../firebase/firebaseConfig";
Let's also import some additional methods from Firebase:
import { signInWithPopup, signOut } from 'firebase/auth';
signInWithPopup as the name might suggest, will open a pop-up window which will prompt users to sign in using their Google account(s), in other words, you don't have to design your sign-in component by yourself. However, you can also use the signIn method and redirect the users to a sign-in page, which is recommended on mobile devices.
signOut will simply sign out the currently signed-in user.
Now, we have all the arsenal that we need to create our login and logout functions. We can do it like this:
function handleLogin() {
    signInWithPopup(auth, provider).then(() => {
      setLoggedIn(true)
    })
  };

  function handleLogout() {
    signOut(auth)
    setLoggedIn(false)
  };
And it was as easy as that!
Once, a user is signed in, try console logging the auth object. You'll see something like this:

As you see, we get all this information about the user who's currently signed in. We can access the user's ID, display name, as well as many other properties through this auth object.
We can then use this to set and toggle the state of certain variables, route the user to different pages, and manage the overall state of our application.
Conclusion:
Firebase Authentication simplifies the process of adding secure user authentication to your web and mobile applications. By following the steps outlined in this guide, you can quickly set up and use Firebase Authentication in your project, providing your users with a seamless and secure authentication experience. Explore Firebase's documentation for more advanced features and customization options to tailor the authentication flow to your specific needs.
Happy coding, and thanks for reading!